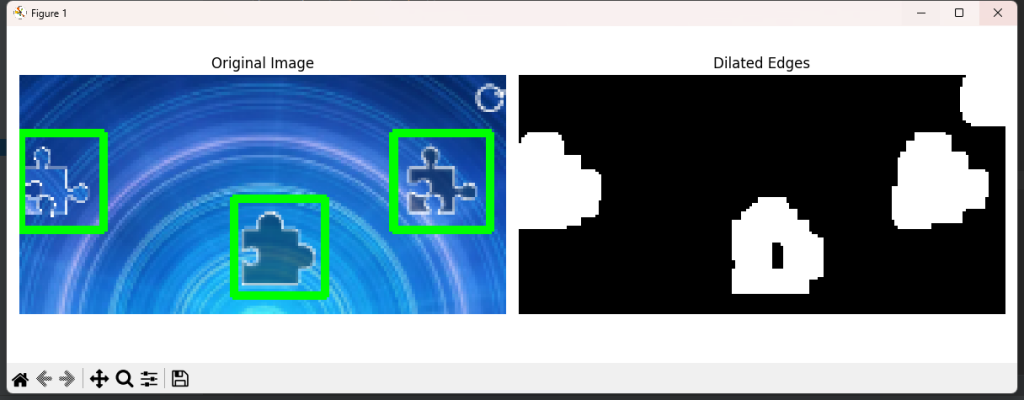
自动化拖动控件完成验证:把背景变黑,把控件变白,圈起来,找出2个Y坐标相似的目标从左往右拖拽过去就可以了。
灰度、二值化、膨胀、高斯模糊 等OPENCV的手段都试试。
import cv2
import numpy as np
import matplotlib.pyplot as plt

# 读取原始图像
image = cv2.imread('test.png', cv2.IMREAD_COLOR)

# 转换为灰度图像
gray_image = cv2.cvtColor(image, cv2.COLOR_BGR2GRAY)

# 使用Canny边缘检测提取轮廓
edges = cv2.Canny(gray_image, 400, 400)

# 膨胀处理,减少迭代次数
kernel = np.ones((5,5), np.uint8)
dilated_image = cv2.dilate(edges, kernel, iterations=2)

# 查找轮廓
contours, hierarchy = cv2.findContours(dilated_image, cv2.RETR_EXTERNAL, cv2.CHAIN_APPROX_SIMPLE)

# 遍历轮廓并绘制矩形
for cnt in contours:
    area = cv2.contourArea(cnt)
    areaMin = 300
    areaMax = 2000
    if area > areaMin and area < areaMax:
        peri = cv2.arcLength(cnt, True)
        approx = cv2.approxPolyDP(cnt, 0.02 * peri, True)
        x, y, w, h = cv2.boundingRect(approx)
        cv2.rectangle(image, (x, y), (x + w, y + h), (0, 255, 0), 2)

# 显示图像
plt.figure(figsize=(12, 4))

plt.subplot(1, 2, 1)
plt.title("Original Image")
plt.imshow(cv2.cvtColor(image, cv2.COLOR_BGR2RGB))
plt.axis("off")

plt.subplot(1, 2, 2)
plt.title("Dilated Edges")
plt.imshow(dilated_image, cmap='gray')
plt.axis("off")

plt.tight_layout()
plt.show()